/* jquery */ /* jquery accordion style*/ /* jquery init */

Magnetometer Compass (micro:bit MicroPython)

This time we'll take advantage of the micro:bit's magnetometer sensor (which detects magnetic fields) to build a North-finding compass app.

from microbit import *

# draw a circle calibration
compass.calibrate()

while True:
   sleep(100)
   val = compass.heading()
   if (val < 10 or val > 350):
      # the micro:bit is pointing North
      display.show('N')
   else:
      display.show(Image.NO)

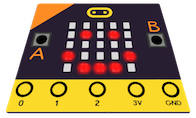
Note that the magnetometer needs to be calibrated before we use it. This is done by tipping the micro:bit around to draw a circle on the LEDs. Be aware that sometimes the magnetometer calibration can be affected by the magnetic fields emanating from an electronic device, such as a computer.

As a coding challenge you could try to add compass directions for South, East and West.

Return to the micro:bit MicroPython Coding Tutorials page.

Spirit Level (micro:bit MicroPython)

This time we'll create a spirit level that uses x-axis data from the micro:bit's built-in accelerometer sensor.

from microbit import *

while True:
   # obtain the accelerometer x-axis value
   x = accelerometer.get_x()
   # perform an integer division
   val = x // 20
   # test the value
   if val > 0:
      display.show(Image.ARROW_E)
   elif x < 0:
      display.show(Image.ARROW_W)
   else:
      # Yes – I am level
      display.show(Image.YES)

The micro:bit's accelerometer is sensitive to the slightest movement. In fact, it is too sensitive for our purposes. So here we take the returned accelerometer x value and divide it by 20 using the integer divide // symbol.

For a simple coding challenge try changing the integer division value from twenty to something smaller or larger, then discover how much harder or easier it is keep level.

A more advanced coding challenge would be to create a dual axis spirit level using both the get_x() and get_y() accelerometer functions.

Return to the BBC micro:bit MicroPython Coding Tutorials page.

Dice Shaker (micro:bit MicroPython)

In this tutorial we'll take advantage of the 'shake' accelerometer gesture to build a dice shaker, which can be used to play all kinds of games.

from microbit import *
import random

while True:
   if accelerometer.was_gesture('shake'):
      # generate a random integer from 1 to 6
      diceNumber = random.randint(1,6)
      # show the dice number
      display.show(str(diceNumber))
      sleep(1000)

Notice here we import the random MicroPython library module as well as the standard microbit library module.

After you've downloaded this program to the micro:bit try to shake a six!

As a extra coding challenge you could modify the code to simulate two dice (hint: the minimum throw is 2 and the maximum is 12).

Return to the micro:bit MicroPython Coding Tutorials page.

Capture Gestures (micro:bit MicroPython)

This time we'll capture movement gestures, as recognised by the micro:bit's built-in accelerometer sensor.

from microbit import *

while True:
   # obtain the current gesture
   g = accelerometer.current_gesture()

   # is the micro:bit face up or face down?
   if g == 'face up':
      display.show(Image.HAPPY)
   else:
      display.show(Image.SAD)

Once again we indent the main code inside a While True: endless loop so the program can continuously test for gesture changes.

After you've downloaded and run this program on the micro:bit modify the code to discover other recognised gestures, such as: 'up', 'down', 'left', 'right', 'freefall' and 'shake'.

Return to the BBC micro:bit MicroPython Coding Tutorials page.

Temperature Sensor (micro:bit MicroPython)

In this example we obtain the temperature of the micro:bit processor, which rises quite quickly after it is powered on.

from microbit import *

while True:
   # obtain the CPU temperature
   t = temperature()
   display.scroll(str(t) + 'C')
   # wait 5 seconds before repeating
   sleep(5000)

Once again we indent the main code inside a While True: endless loop. However, this time there's a five second delay between each loop iteration.

Notice that we also use the str() function to convert the integer temperature value in the variable t into a string. Leaving it as an integer will result in an error condition when the program runs.

To see the temperature rise disconnect the micro:bit for a while, so it can cool down, then reconnect to downloaded and run the program. Next try modifying the code to display the temperature in Kelvin (hint: 0 Celsius is 273 Kelvin).

Return to the micro:bit MicroPython Coding Tutorials page.

Custom LED Images (micro:bit MicroPython)

Sometimes the pre-defined MicroPython images don't cover what we need.

However, the good news is we can design our own custom images. Here's how it is done:

from microbit import *

# build a string with 25 digits using the numbers from 9 to 0
# where 9 is maximum brightness and 0 switches the LED off
img = Image('99999:07770:00500:03330:11111')
display.show(img)

The micro:bit's 25 pixel LED display is arranged as a five row and five column grid. We can create our own image by setting an LED brightness value for each LED. A value of 9 represents the maximum brightness while a value of 0 switches the LED off.

The image defined by a long string of digits. This string is divided up into five sections, separated by a colon (:) character, with the first section representing the top LED row. And each section contains five digits, with the first digit corresponding to the first column.

After you've downloaded and run this program on the micro:bit modify the string to display your own LED images. It's a good idea to sketch out the pattern designs on paper first using a simple 5x5 grid pattern.

Return to the micro:bit MicroPython Coding Tutorials page.

Images & Animations (micro:bit MicroPython)

Here's how to display images and image animations on the LEDs.

from microbit import *

# images
display.show(Image.HAPPY)
sleep(2000)
display.show(Image.HEART)
sleep(2000)
display.show(Image.PACMAN)
sleep(2000)
display.show(Image.SNAKE)
sleep(2000)
# animations
display.show(Image.ALL_CLOCKS)
sleep(2000)
display.show(Image.ALL_ARROWS)

After you've downloaded and run this program on the micro:bit try out these other image names: SMILE, SAD, CONFUSED, ANGRY, ASLEEP, SURPRISED, SILLY, FABULOUS, MEH, YES, NO, TRIANGLE, TRIANGLE_LEFT, CHESSBOARD, DIAMOND, SQUARE, RABBIT, COW, MUSIC_CROTCHET, MUSIC_QUAVER, MUSIC_QUAVERS, PITCHFORK, XMAS, TARGET, TSHIRT, ROLLERSKATE, DUCK, HOUSE, TORTOISE, BUTTERFLY, STICKFIGURE, GHOST, SWORD, GIRAFFE, SKULL, UMBRELLA, SNAKE.

Return to the BBC micro:bit MicroPython Coding Tutorials page.

Capture Button Press (micro:bit MicroPython)

This little program display a different image when the 'A' and 'B' buttons are pressed.

from microbit import *

while True:
   if button_a.is_pressed():
      display.show(Image.HAPPY)
   if button_b.is_pressed():
      display.show(Image.SAD)

Here we use a While True: statement which create an endless loop. Make sure you use the correct indentation levels for the code inside the loop and inside the 'if' test statements to avoid errors when the program runs.

After you've downloaded and run this program on the micro:bit try changing the image names for the A and B buttons.

Return to the micro:bit MicroPython Coding Tutorials page.

Countdown Timer (micro:bit MicroPython)

Type in the following code to create a three second timer.

from microbit import *

display.show('3')
sleep(1000)
display.show('2')
sleep(1000)
display.show('1')
sleep(1000)
display.show('0')

Notice we put quotes around the countdown numbers so they appear as strings to the display.show() function.

After you've downloaded and run this program on the micro:bit have a go at building a 10 second timer.

Return to the BBC micro:bit MicroPython Coding Tutorials page.

MicroPython Coding with Mu

What is Mu?
Mu is a free BBC micro:bit code editor, written in Python 3, designed to run on Microsoft Windows, Apple Mac and Linux computers or the popular Raspberry Pi.

Why Mu?
Mu has built-in support for the MicroPython language. It can flash programs to the micro:bit with a single click. And it has a special panel to help locate and fix coding errors.

Install Mu
Visit the Mu website codewith.mu, then follow the download and install instructions for your PC or Raspberry Pi.

Using Mu
Here's what the most important Mu icons do:
  New, Load and Save manage your Python code files.
  Flash creates a '.hex' file and uploads it to the micro:bit.
  Repl opens a command console and error debugging panel.

Coding With Mu
To begin coding follow these steps:
  1) Connect the micro:bit to the PC with a USB cable
  2) Start the Mu app and open a New code file
  3) Type in your code (see below)
  4) Open the Repl window panel (in case of any errors)
  5) Click the Flash icon to transfer and run your program

Hello Code Example
Carefully enter these two lines of Python code into Mu, then click the Flash icon to transfer it to the micro:bit device.

from microbit import *
display.scroll('Hello!')

After watching the message scroll across the LED display try replacing 'Hello!' with your own message, remembering to put it inside the quotes ('').

Return to the micro:bit MicroPython Coding Tutorials page.

MicroPython Coding in 4 Simple Steps

Step 1
Connect your PC or Raspberry Pi to the micro:bit board with the USB cable.

Step 2
Using a web browser navigate to the python.microbit.org website.

Step 3
Now carefully enter these two lines of Python code into the editor...

from microbit import *
display.scroll('Hello!')

Step 4
Finally, click the 'Download' icon, select the micro:bit device and watch the message scroll LED display.

Create a Custom Message
Try replacing 'Hello!' with your own message, remembering to put it inside the quotes ('').

Return to the micro:bit MicroPython Coding Tutorials page.

micro:bit Overview

The micro:bit is a small embedded system designed to help schools teach coding and other constructional thinking activities.

Despite its diminutive size the board is loaded with features. The most obvious are the 5x5 LED matrix display and the two push buttons.

However, there's also temperature, accelerometer and magnetometer sensors, both radio and bluetooth wireless communication, plus an array of digital and analog I/O pins that interface connect the micro:bit to electronic circuits, additional sensors, robotic kits and other gadgets.

Once connected to a PC or Raspberry Pi via the USB cable you can write and download micro:bit programs using Code Blocks, MicroPython, C++ or Javascript/Typescript.

Return to the micro:bit MicroPython Coding Tutorials page.